
Ultimate Whirlpool Ice Maker Troubleshooting Guide: Diagnose and Fix Common Failures
The automated convenience of a modern refrigerator ice maker is fantastic—until it abruptly stops working. Whether your appliance is struggling to keep up with demand, completely failing to produce cubes, or leaking water onto your floor, these disruptions can severely impact your daily routine. This comprehensive diagnostic guide breaks down the most frequent causes of ice maker malfunctions and provides practical, DIY-friendly solutions to get your system running smoothly again.
Our guide covers essential components, from water inlet valves and filter lines to the control arm and compartment thermostats, helping you determine whether you need a simple adjustment or a complete replacement assembly.
1. Ice Maker Not Working or Producing Insufficient Ice
An ice maker that fails to produce ice is merely wasting valuable freezer space. If production has dropped or halted entirely, check the following culprits:
- Blocked Water Filter:
Cause: The filter is designed to trap impurities, but over time it can become severely congested, restricting water flow to the ice maker unit.
Solution: Replace your water filter every six months. Symptoms of a heavily clogged filter include slow dispensing, strange-tasting water, dark specks, and halted ice production. A fresh filter is critical for high-demand units like the W11284458 [cite: 1.1.1] or WPW10190965 [cite: 1.2.1] assemblies. - Defective Water Inlet Valve:
Cause: If your filter is brand new, the water inlet valve may be failing. The valve requires a minimum of 20 psi to open and supply water.
Solution: Test the home water pressure. If it registers at 20 psi or higher but water isn’t flowing, the inlet valve likely needs to be replaced. - Compartment Temperature is Too Warm:
Cause: The system cannot freeze water efficiently if the surrounding environment is too warm, leading to slow production or tiny cubes.
Solution: Adjust your thermostats. The freezer must be set to 0°F (-18°C), and the refrigerator should remain between 33–40°F (0–4°C). - Mispositioned Control Arm:
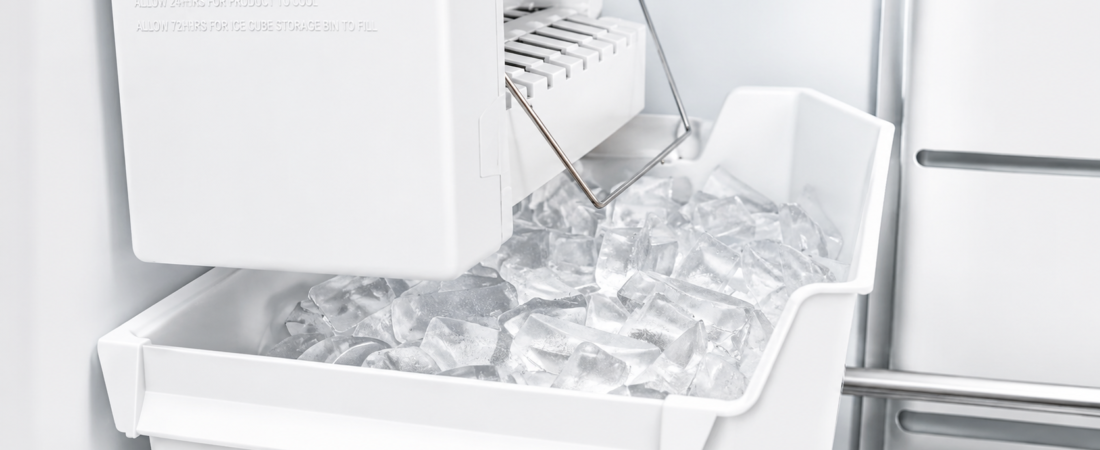
Cause: The metal or plastic feeler arm monitors ice levels, shutting off the machine when the bin is full. If bumped into the “off” position, loosened, or broken, production stops.
Solution: Verify the arm is pushed down into the “on” position. If the mechanism is physically snapped (a common wear issue on older modules like the D7824706Q [cite: 1.2.3]), contact a professional for replacement. - Frozen Water Inlet Tube:
Cause: Excessively low freezer temperatures or degraded line insulation can cause the supply line behind the unit to freeze solid.
Solution: You will typically need to remove the ice bin to access the line. Thawing it with warm air is possible, but utilizing a professional to prevent recurring freezes is recommended.
2. Making Ice, But Refusing to Dispense
Hearing the motor grind while no ice drops from a visibly full bin indicates a delivery jam:
- Ice Clumping in the Bin:
Cause: The built-in auger breaks up normal ice, but infrequent use causes cubes to melt slightly and fuse into massive blocks the motor cannot handle.
Solution: Break apart smaller clumps manually. For severe blockages, remove the entire bin and defrost it completely in the sink. - Dispenser Chute Blockage:
Cause: Irregular chunks can wedge into the dispensing chute, creating a severe bottleneck.
Solution: Inspect the chute from below. Jiggle loose cubes gently. If it is solidly lodged, place a container underneath and allow it to melt naturally. Never chip at it, as this can crack the plastic chute. - Frozen Auger Motor:
Cause: The auger motor located behind the rear freezer wall can become encased in frost, preventing it from turning.
Solution: Defrosting this electrical component can lead to moisture damage. It is best to have a qualified technician handle motor-related failures.
3. Overproducing and Overflowing Ice
If your freezer is overflowing with cubes, the sensor system has failed to trigger the automatic shutoff:
- Improper Bin Positioning:
Cause: If the bucket isn’t pushed back completely, ejected cubes miss the container entirely, mimicking an overflow issue.
Solution: Ensure the bin is seated squarely beneath the ice mold. - Broken Control Arm:
Cause: A fractured control arm cannot sense the rising ice level and will never send the shutoff signal.
Solution: Inspect the arm closely (especially on modular units like the WPW10300024 [cite: 1.2.3]). If cracked, the assembly requires repair or replacement. - Missing Sensor Shelf:
Cause: Certain models rely on a specific shelf to elevate the bin so the control arm can accurately read the height of the ice.
Solution: Consult your refrigerator’s manual to ensure no structural shelving is missing.
4. Ice Has a Strange Taste or Odor
If your drinks are being ruined by foul-tasting ice, the problem is usually environmental:
- Expired Water Filter:
Cause: A saturated filter loses its ability to neutralize municipal water contaminants and chlorine.
Solution: Strictly adhere to a 6-month filter replacement schedule. - Stale Cubes:
Cause: Ice acts like a sponge for ambient odors. Cubes sitting in the bin for weeks will taste incredibly stale.
Solution: Routinely dump the ice bin if you do not use the dispenser frequently. - Improperly Wrapped Food:
Cause: Pungent foods stored near the ice bin in thin packaging will seep odors into the cubes.
Solution: Always use high-quality, airtight freezer bags or hard containers for food storage.
5. Ice Maker is Leaking Water
Puddles on the floor or a solid sheet of ice at the bottom of the freezer compartment require immediate attention:
- Jammed Clumps Causing Melt:
Cause: Ice lodged in the door chute is exposed to warmer room air, melting and dripping down the front of the fridge.
Solution: Clear chute blockages gently or allow them to melt into a strategically placed towel and bowl. - Unlevel Appliance:
Cause: If the refrigerator leans, defrost water cannot easily reach the drain and will pool inside the bin or compartment.
Solution: Place a level on the ice maker floor. Adjust the leveling legs of the refrigerator until perfectly balanced. This is crucial when installing aftermarket replacement kits like the 4317943 [cite: 1.2.2]. - Misaligned Fill Tube:
Cause: The water spigot must line up directly over the unit’s fill cup. If misaligned, water splashes straight into the freezer cavity.
Solution: Inspect the valve spigot and bend or adjust it so water flows accurately into the cup.
6. Ice Cubes are Too Small or Hollow
When cubes come out tiny, fractured, or hollow inside, the freezing process is being interrupted:
- Poor Water Flow:
Cause: A kinked rear line or clogged filter prevents the trays from filling to the brim.
Solution: Check the line behind the fridge for crimps, install a new filter, and ensure the machine is level. - Temperatures Set Too Low:
Cause: It seems counterintuitive, but if the freezer is colder than -10°F, the cube’s exterior freezes so rapidly that the thermostat ejects the ice before the liquid center has time to solidify.
Solution: Raise the freezer temperature back to the optimal 0°F (-18°C).
7. The Ice Maker Mechanism is Completely Frozen
When the entire assembly is encased in a block of ice, normal operations cease entirely:
- Excessively Cold Settings:
Cause: Extreme cold freezes the water inside the inlet tube before it ever reaches the mold.
Solution: Correct the thermostat to 0°F (-18°C) for the freezer and 33–40°F (0–4°C) for the fridge, and allow 24 hours to thaw. - Chronically Frozen Inlet Tube:
Cause: Even with perfect temperature settings, a failing water inlet valve can slowly leak, eventually causing the tube to freeze shut completely.
Solution: While you can carefully thaw it with warm air, recurring freezes dictate that a professional should diagnose the valve or line insulation.
Whirlpool Ice Maker Replacement Parts & Compatibility Reference
If troubleshooting confirms that your ice maker assembly has suffered mechanical or electrical failure, replacing the entire modular unit is often the most cost-effective and reliable solution. As an independent distributor of home appliance repair components, we support a massive global catalog of OEM and aftermarket parts for your specific repair needs.
To ensure proper fitment, cross-reference your refrigerator’s model tag with our comprehensive index of Whirlpool refrigerator ice maker assemblies, control boards, and upgrade kits. Our inventory coverage includes, but is not limited to, the following highly sought-after component numbers:
Standard Modules & Upgrade Assemblies:
W11284458 [cite: 1.1.1], W11397192 [cite: 1.1.2], W11729596 [cite: 1.1.4], W11115534 [cite: 1.1.5], W11557001 [cite: 1.1.5], 2198597 [cite: 1.2.1], WPW10190965 [cite: 1.2.1], 4317943 [cite: 1.2.2], WPW10300022 [cite: 1.2.3], W10882923 [cite: 1.2.3], WPW10300024 [cite: 1.2.3], WPW10272869 [cite: 1.2.4], WPW10190961 [cite: 1.2.4], WPW10190972 [cite: 1.2.4], WPW10764668 [cite: 1.2.4], and WPW10300023 [cite: 1.2.4].
Legacy Cross-Reference & OEM Substitution Part Numbers:
W10645967 [cite: 1.1.2], W10645968 [cite: 1.1.2], W10913630 [cite: 1.1.2], W11084540 [cite: 1.1.2], W11238143 [cite: 1.1.2], WP2317251 [cite: 1.2.1], RIM597 [cite: 1.2.2], RIM943 [cite: 1.2.2], 797991 [cite: 1.2.2], 625601 [cite: 1.2.2], 4210317 [cite: 1.2.2], D7824706Q [cite: 1.2.3], WPW10251076 [cite: 1.2.3], 1129316 [cite: 1.2.3], WPW10277448 [cite: 1.2.3], WPW10277450 [cite: 1.2.3], WP2304016 [cite: 1.2.4], W10801996 [cite: 1.2.4], W10757851 [cite: 1.2.4], WPW10757851 [cite: 1.2.4], W10408179 [cite: 1.2.4], 1129313 [cite: 1.2.4], and the integrated W10190961RK [cite: 1.2.4] board kit.
Always consult your user manual or reach out to our technical support desk to confirm compatibility before purchasing.